I know it’s been a while, but we are still working on the basement renovation.
This week, I want to share some of the recent updates.
We’ve actually been quite busy since we completed the installation of our basement egress windows.
Check out that post for more “before” pictures and detailed background information.
Prior to installing the windows, we had already installed some of the insulation. We chose a panel version of what most people know as “spray foam” insulation.
These panels installed fairly easily with an extra strength adhesive and these anchors that A. tacked in after drilling holes in the foundation walls.
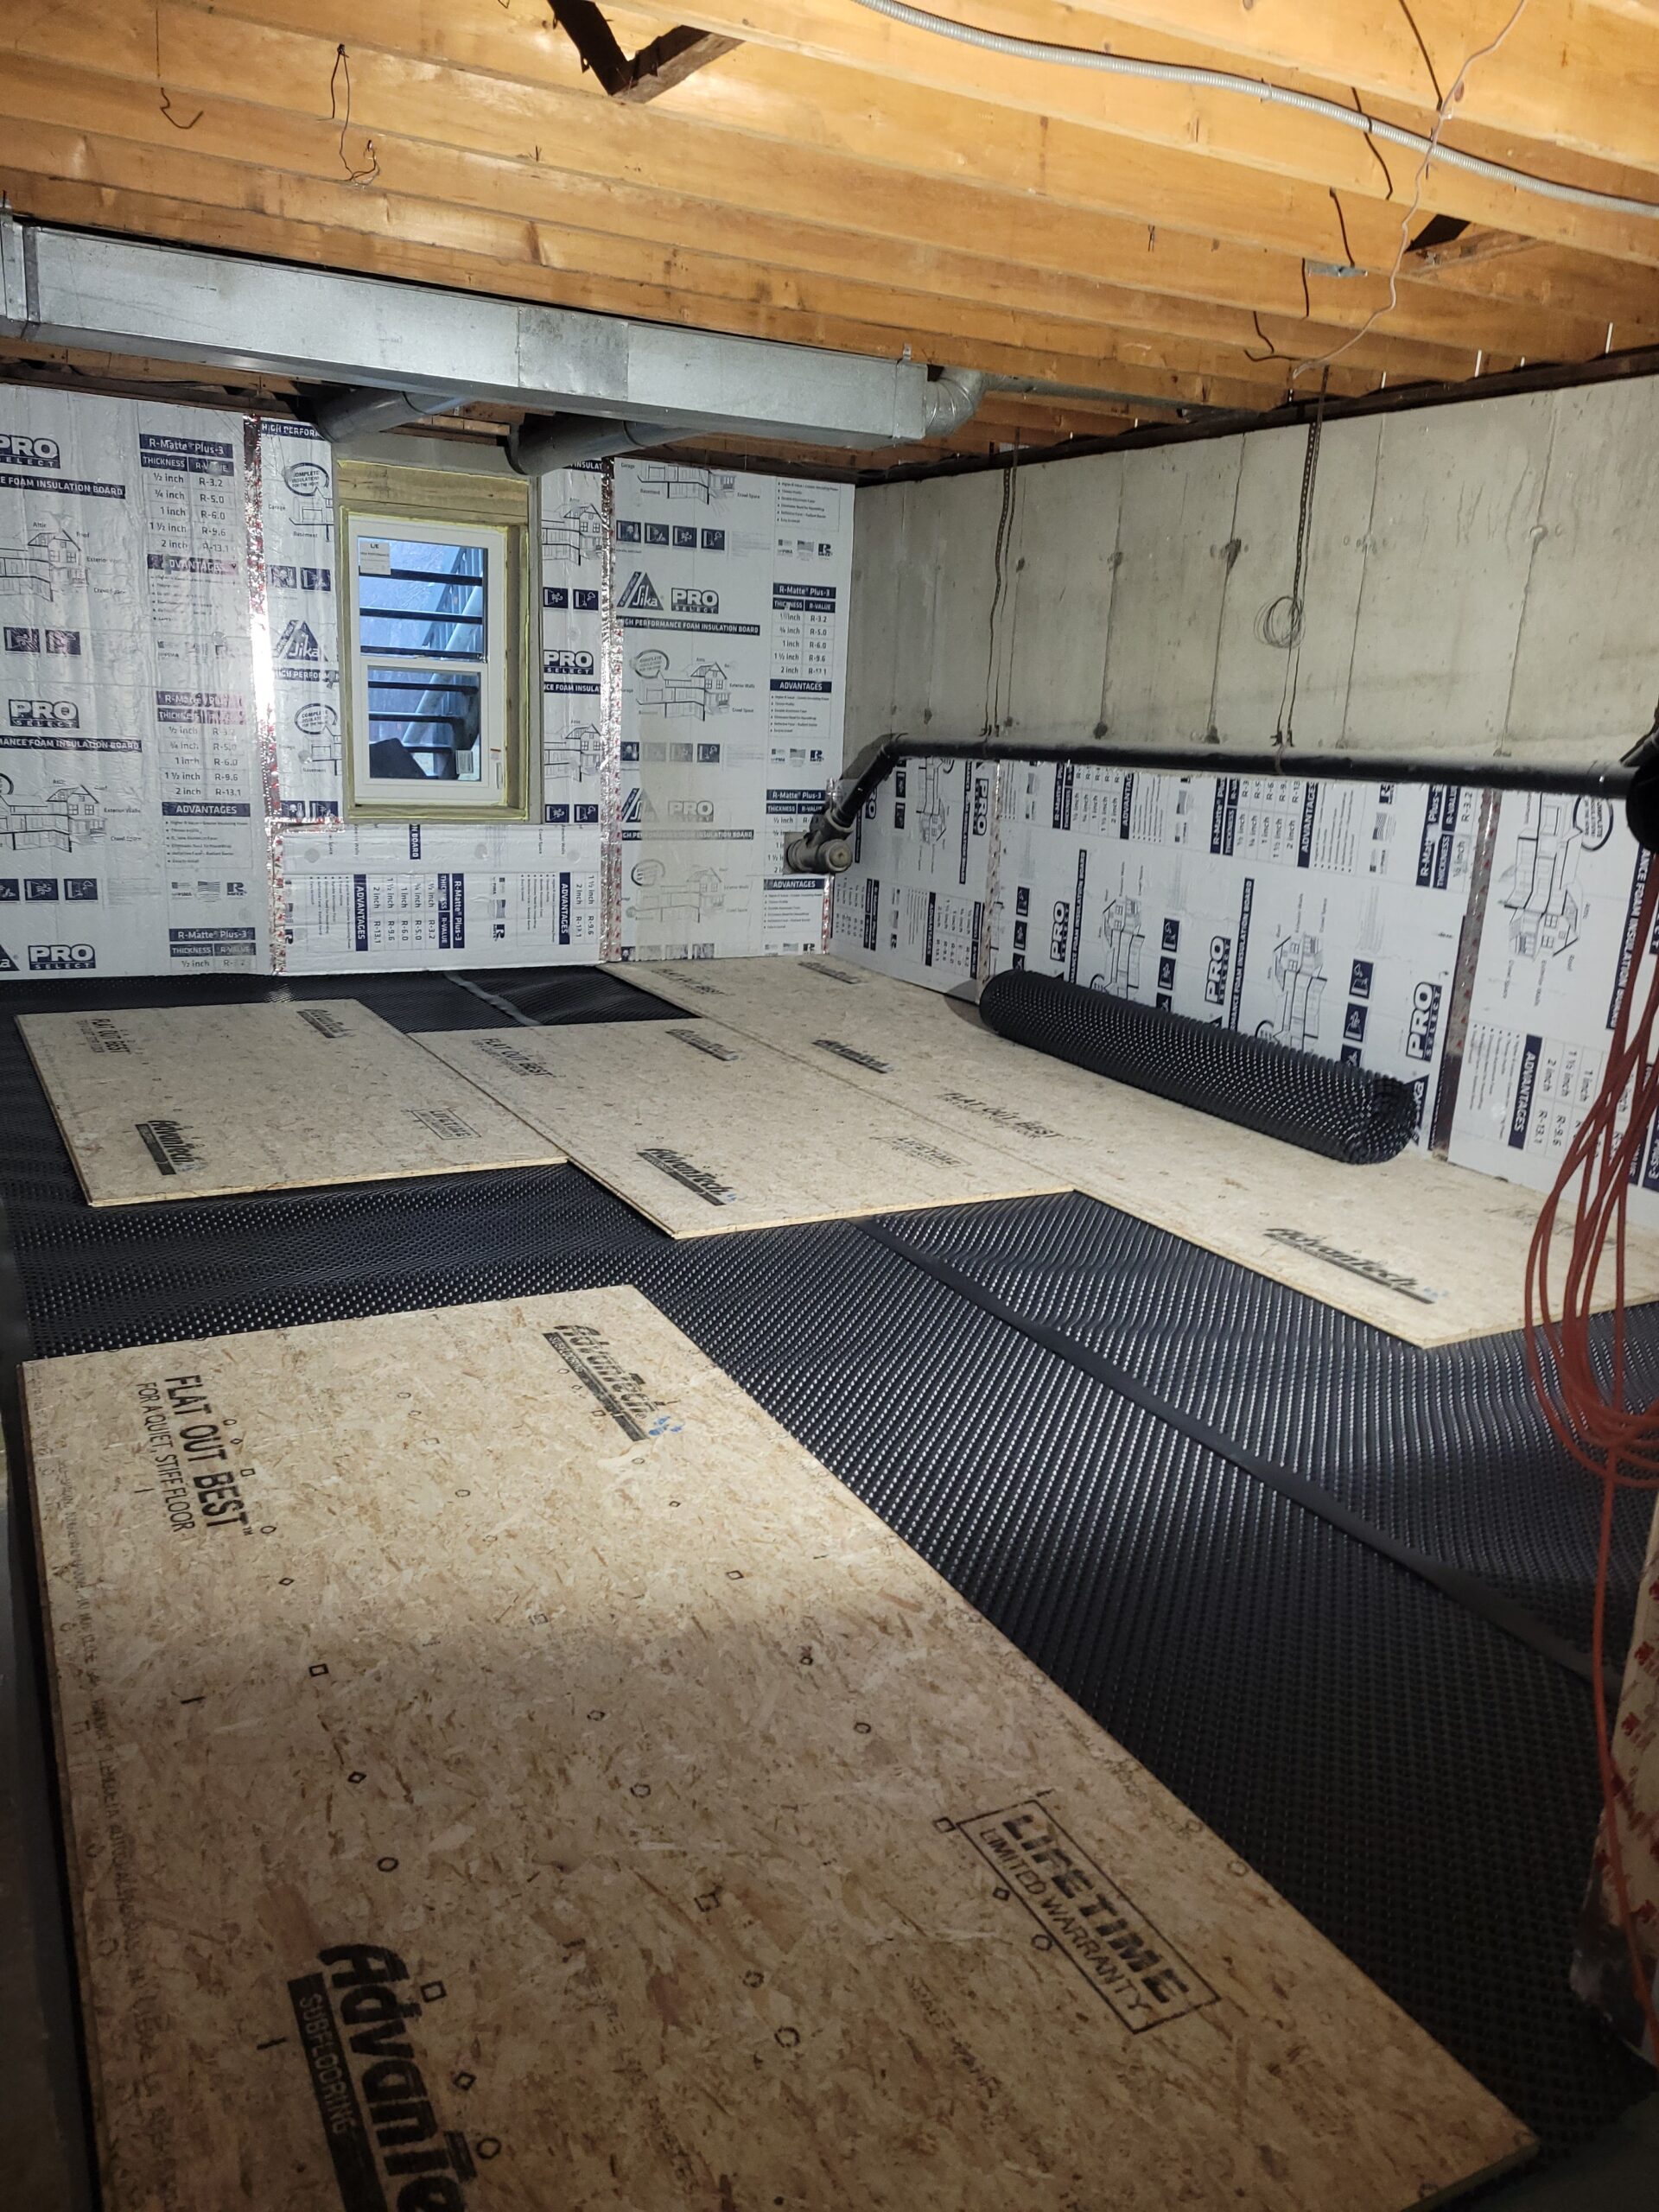
Well, over the last several weeks, we finished installing pretty much all of the insulation panels (minus the few that we can’t install yet because the furnace, water heater, etc. are in the way).
PLUS, even more significantly, we made some serious progress installing the subflooring.
Subflooring
There was some preparation required before we could dive fully into laying flooring.
#1: We had to deal with “mount wire.”
Mount Wire is the nickname we gave to the excessive amount of wire that A. had pulled early on in the renovation. We had gradually added more and more wire until it felt like a mountain.
Well, we had to take all this wire and load it into wheelbarrows to bring around the back of our house to the truck so that we could ultimately take it to the scrap yard.
#2: Old linoleum tiles
We had removed some portions of linoleum tile early in the demolition, but we still had a few sections left beneath the stairwell and around the existing laundry room.
I worked on chipping away the remaining tiles using a combination of a scraper and a demolition drill with a chisel attachment.
#3: Damaged sheetrock and framing
We also had to remove some of the sheetrock and framing around the stairwell because it had signs of previous water damage.
A. ended up cutting and pulling out the bottom sections of drywall and then cut the wood around the base of the stairwell.
We did this in order to slide the subflooring materials beneath this entire section now, but we will ultimately replace the studs when we build out the wall.


So once we got this preliminary stuff out of the way, the subflooring went pretty quickly.
We started by rolling out a plastic, dimpled underlayment.
This material will help allow any condensation or unanticipated moisture in the future to dissipate without impacting the flooring that comes above.
Then we were able to take the interlocking plywood sheets that we purchased (a special kind of plywood that is specially treated as well to repel water) and started laying them out, making cuts as needed before knocking them into place and screwing them down.


It is amazing what a difference the subflooring has made already.
The concrete floor was so much colder and made the space feel darker.
We had to pause before we made it all the way across the basement because we need to relocate the laundry room to its new home before we can rip out that remaining wall and plumbing and lay the remaining subfloor.
Still, major progress!
We are now beginning to draw out the rest of the layout and then A. will start framing one of the closets and laying out the new laundry area.
Stay tuned for more updates!
2 responses to “Basement Reno: Subflooring and Insulation”
[…] I shared previously, A. and I are working on a basement renovation. We gutted the basement in the house we purchased last year and have been gradually working on […]
[…] had leftover plywood from the subflooring project in our basement, and A. felt that shelves would be a great use for the remnants. So I only needed […]