This week was all about building landscape steps into the hill at our new house.
THE BEFORE

There was a little landing leading from the driveway to the deck, as seen here, but the hill that you naturally walk down to cross the backyard was very uneven and steep.
I frequently felt like I had to jog/run down the hill because it always felt like I was falling/going to fall when I was walking down it.
I had started to research ways to build steps into a hillside, but when A and I started pulling 4×4 fence posts out from around the yard, I realized we already had the equivalent of landscape timbers!
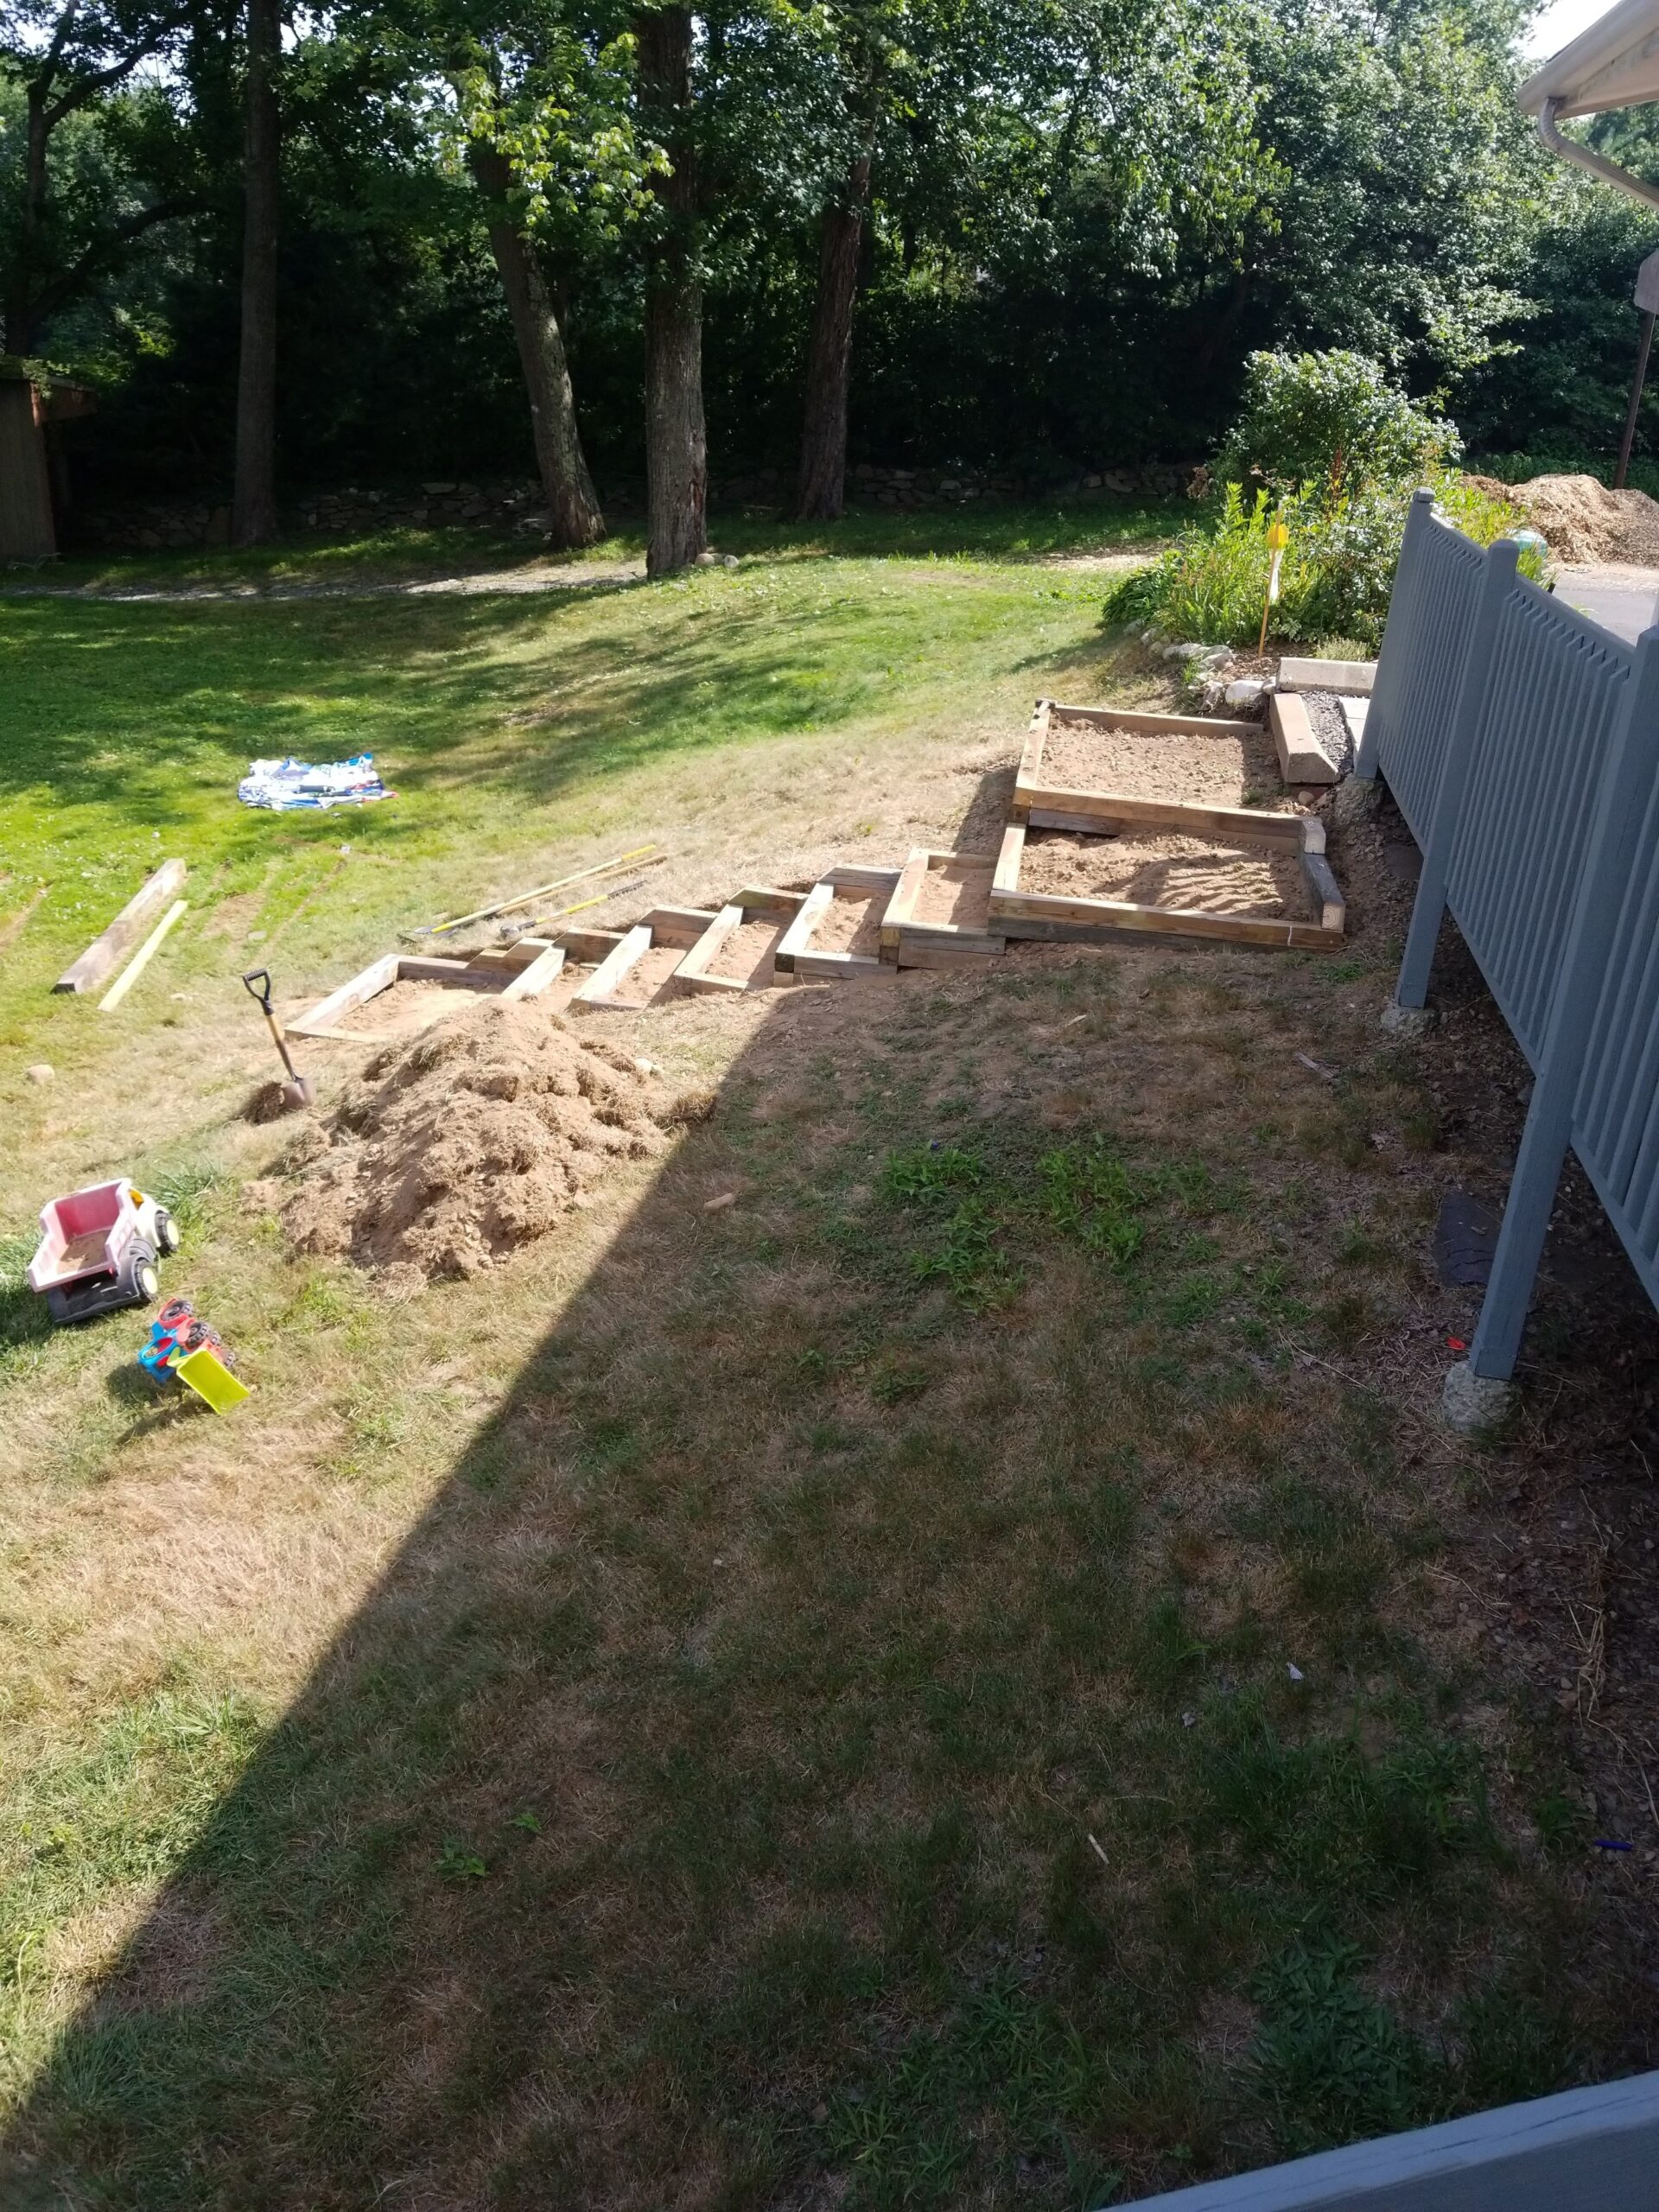
Day One
Silly me, I imagined this would be a very simple and quick undertaking but it ended up being pretty intense.
Thank goodness A has the patience of a saint and the know-how to make my crazy ideas come to fruition. He is the greatest.
Here’s the first step/landing laid out.


Although it would have been potentially simpler to build the steps straight down from this initial landing, there was an underground drainage pipe running diagonally across the yard in this area and we needed to avoid puncturing it.
So we built the first landing around the drainage pipe clean-out (see the white pipe sticking up in the photos above) and then decided to make a smaller landing to the right of that landing (if you’re looking up the hill).

It took us about 3 hours to get the initial landing, the second landing, and the first step in place. That was where we left it for the day because I had to pick up the kids from camp.

Day Two
We had the general process for building the steps down, and since we were now working with steps of all the same size, we divided and conquered. Divode? I feel like that should be the past tense because “divided” sounds awkward.
I digress.
Anyway, A worked on cutting the posts and constructing the “boxes” that would be laid in place, and I worked on digging. And more digging. And more digging.

By midday on the second day, we were about halfway down the hill. This is a good point to share that the wheelbarrow in the picture above was a casualty of the project.
Looking at the photo now, you can totally see how the left wheel is bowing outward. But in the midst of the digging and sweating, I was completely oblivious to the fact that the hunks of sod and scoops of soil that I was shoveling inside the wheelbarrow were weighing it down too much given the slope of the hill.
I tried to move the wheelbarrow later and the wheel just completely cracked.
Sad moment. Especially given how much mulch we had in the driveway that I was planning to use the wheelbarrow to move.
A few steps (and hours) later, and we had effectively covered the full slope.

We concluded with a bit of a landing too so the final step is a bit deeper than the others. I was very excited about the finished product (even though, as A was quick to point out, the steps were not perfectly level).
Day Three
We had a ton of free mulch dropped in our driveway the week prior, and while we used some of it to mulch around a variety of plants and such in the yard, I figured a good use for it would also be covering the top layer of each of the steps.
So on the morning of day three of this project, I added the mulch and shoveled a bit more dirt in around the outside edges.
Late on day two, A had added some smaller pieces to the edges to make the sides of the steps even with the hillside around it. This was an unexpected surprise that I also very much loved!
THE AFTER


Overall, I was really pleased with the outcome. They aren’t perfect and they won’t last forever, but the whole project cost roughly $100 (for rebar and the extra long screws) and was finished pretty quickly.
Let me know what you think of the finished product in the comments below!